Showing posts with label How-To. Show all posts

Saturday, February 18, 2012

Noah's original artwork

Recently my son made a beautiful watercolor painting. I wanted to show it off in our home but couldn't find the right frame. Instead, I found a jigsaw. And it was love. Anyway, I have lots of random pieces of wood in my basement that I've collected over the years (much to my husband's chagrin!) and traced the size of the painting onto a board. I used the beveled edge to make a 45-degree-angled cut. I spray painted the edges black. I used Modge Podge to glue the painting to the frame. Then I covered the painting with Modge Podge to give it a glossy finish. I screwed 2 short screws into the back. My next step is to get some wire and then hang this beautiful artwork on the wall.


In case you're wondering, I'm labeling this post as a kid project because of the watercoloring. Don't worry, I don't let my children near the jigsaw.

Thursday, December 15, 2011

Christmas Presents: Apron and Tutu


While coming up with Christmas present ideas this year, we tried to come up with things for our kids that were practical and that they would also enjoy. And that wouldn't lead to more toys being thrown all over the place and abandoned after 2 days. Here's what I came up with:

An apron for Noah--he loves to help in the kitchen


A tutu for Maren--she loves shoes and pretty clothes.


For the apron, I bought 1 yard of fabric (I had quite a bit leftover so if you're feeling stingy, you could probably get by with 3/4 or 7/8. heck just get the whole yard!) I didn't use a pattern and I wanted it to be a surprise so I got a shirt and a pair of pants from Noah's dresser and laid them together like they would look on a person. I used that to gauge the width and length of the apron. I fold the material in half and cut out half an apron on the fold. I cut it a little bit larger for the seam allowance. I cut out 2 4-inch-wide strips for the ties (maybe 12 or so inches long?) and then a longer strip for the neck strap. I cut out a square to add on as a pocket. I folded the seams under twice and then zig-zag top-stitched all of the seams. Can't wait to see it on him!

For the tutu, I bought 2 6-inch rolls of tulle. (one light and one dark shade of purple). One roll has about 25 yards and costs $3. I got a 1-inch elastic. I measured Maren's waist and subtracted 3 inches since the elastic will stretch as you are making the tutu. I sewed the elastic into a band. I cut the tulle into 24-inch lengths. I pulled the elastic band onto my thigh like a garter and watched The No. 1 Ladies Detective Agency season 1. I layered 2 pieces of tulle together (dark+light), folded them in half. I put the fold underneath (just barely) the elastic on my leg, then threaded the 4 ends up over the band and through the loop, then pulled the ends back towards my body till the knot was tight. I used both rolls up completely although I could have used a couple more strands. My daughter is 18 months old so if you are making a larger tutu, you would probably need to buy 4 rolls of tulle if making a two-toned tutu, or 3 rolls if making a solid color tutu.

Friday, December 17, 2010

Homemade Bird Feeder

Remember the bird house Noah painted awhile ago? Well there have been no birds so we decided to make a bird feeder to attract some birds (perfect timing in the middle of winter, right?).

What you need:

Toilet paper tube
yarn
peanut butter
*seeds, nuts, and dry fruit
optional: a tree outside your kid's window


1. poke two holes in a toilet paper tube and thread yarn through. Tie a knot. Fill a casserole dish with seeds, nuts, dry fruit.


2. liberally spread peanut butter all over the tube. Even a little on the inside if you want. (Noah thought it was hilarious that we were putting peanut butter on a TP tube despite the look on his face)


3. roll the tube in seed mixture.


4. Hang in a tree next to your bird house. stuff bird house full of extra seed.


(we have not seen any birds yet, I thinking it has something to do with the 12 inches of snow that we got last wednesday, below freezing temperatures, and supposed arctic blasts)

*I used popcorn kernels, sunflower seeds, raisins, and craisins

homemade advent calendar

I meant to post this 16 days ago. Dec 1 I was feeling pretty bummed because I wanted an advent calendar. I thought about it all the week before. Then I had an idea. When I put Noah in his quiet time, I ran downstairs and got to work. this is what I came up with:


(the yellow string "tinsel" is for day 1)

I grabbed a random piece of wood (I have lots to choose from!). Mixed together my random paints to get some decent colors. Let it dry a bit. Nailed 23 nails onto the tree (the stair is the topper and doesn't need a nail). Then I found/made little ornaments for the tree using things I already had around the house (candy, bells, buttons, fuzz balls, etc). Put one each in a muffin tin slot (no muffin making til after Christmas!). Wrapped the tin in wrapping paper and wrote numbers over each muffin slot. (I think a mini muffin tin would work better because it already has 24 slots. Mine only has 12 so I had to refill and re-wrap the tin on the 13th). Drilled two holes in the top for the ribbon. Looks pretty good eh?


(this is after 16 days)

Saturday, July 24, 2010

carseat tent

This "tent" is essential if you want to make it in and out of Walmart without 50 random people poking and prodding at your brand new baby!

It's easy and if you can make it in 2 hours (1 hour if you're a really fast and efficient seamstress/seamster)

What you need:

- 1.25 yards fabric EACH of 2 prints of fabric. I use the fabric you find in the quilting section--it's light and won't suffocate your baby :)

- Velcro

- optional: matching thread

- (And other basic sewing stuff ie: sewing machine, thread, pins, scissors, iron, etc)

Instructions:

1. lay out 2 pieces of fabric with the print sides facing each other. Trim off the extra quarter yard of fabric to be used later


2. from the rectangle you have in front of you, cut out a squarish oval (basically round off the corners of the rectangle). pin edges and sew together. Make sure to leave about 5 inches unsewed so you can turn the tent right side out. I use about a 1/4 inch seam. Turn tent right side out and iron if you feel like it.


3. sew the unfinished 5 inches together by hand with needle and thread. If you want your carseat to have a really nice finished look, you can sew a border around the outside using a 1/2 inch or so seam with the optional matching thread. (I usually do this)

4. With the extra fabric, you will make the straps. Usually I pick the opposite fabric from the topside fabric to make the straps. (For the tent I made for my kids, I put straps on both sides of the tent so that I could use either side for the topside depending on the gender of the current infant. This is not necessary though and was just extra work). I like to have the straps about 3 inches wide and 8 inches long so I cut out a 7 by 9 inch square. Fold it in half with right side facing in on itself. use 1/4 inch seam and sew one short edge and the long edge. turn the strap right side out. (Make 2 straps!)


5. (I sew up the unfinished edge as I sew on the Velcro). Cut Velcro to size. Attach sticky side of velcro on one side of strap. Turn strap over and attach soft side at the opposite end. (The velcro will be at opposite ends and opposite sides so that they sticky together as pictured below). I sew the velcro on and do a finished seam using a 1/4" seam at the same time.


6. Find the middle line of the longer length of the tent. pin the midline of the straps on so they are about 10" from each edge. If you have a carseat handy, check it to see if that's about right. Sew midline of straps to tent using either an X or a rectangle.


7. email/comment/call me if you have questions or clarification! :)

I've made at least 6 of these already and they make a really great baby shower gift. Just a tip, if you would like one for yourself at some point, make one for yourself first to use as a pattern in the future. I finally just made one for myself--before that, every time I made one I had to call around to my other friends who have them to make sure I was doing it right! good luck!

Monday, June 14, 2010

How To Make a Bench, briefly

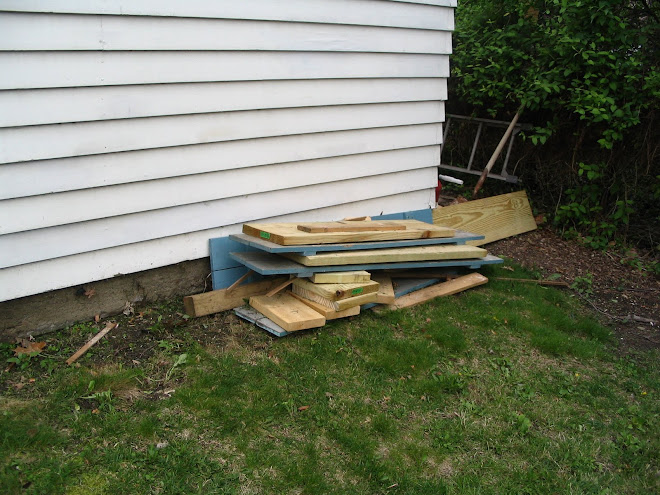
2 months ago, I started visiting a construction site to scavenge for wood scraps for my square foot garden. I got several 4-5ft pieces but unfortunately, all of them were treated and so I couldn't use them for my garden. Since I invested so much time and energy going to the construction site and bugging the poor workers every week, I decided to do something with the wood. I came up with a design for a bench and a table. We ended up making two benches and one short table. A friend let us borrow his circular saw which made this all possible! Here are the drawings for the bench:


The bench seat is about 46" long, 2" deep, and 12" wide. We cut the legs to be about 18" tall. The two cross beams were cut to be the length of the bench seat minus 2 x the thickness of the legs. The crossbeams are probably about 4" wide.

The table follows the same idea except we cut a board in half and put them side by side to make a squarish tabletop. We put a leg at each corner and crossbeams connecting each leg to make the table sturdy.

We primed and painted them a very bright color so that when every thing is brown and dead out here, I will still be able to look out my window and see a little color!

Noah needed a project too